
9th January 2021
The quality of an image should always be prioritised over working fast. However, as in any industry, architectural visualisation projects have time constraints and budgets that must be met in order for studios to survive.
We are going to look at some tips on becoming a more efficient 3D artist. By optimising your workflow, selecting the right tools and developing good habits, you will free up more time to work on the quality of images or focus on other creative tasks.
Identifying and improving, or automating, inefficient processes might not seem like much fun. And you might think that the small time-savings aren't worth the hassle, but trust us, they pay off in the long run. By following these tips you will make yourself a more valuable artist. This is true for all 3D artists, whether you are just starting out, freelancing or working in a studio.
Here are our top 11 tips for working more efficiently and becoming a more productive 3D artist.
Although some tips focus on the tools we use - 3ds Max, Corona and V-Ray the principles remain the same for most 3D software and render engines.
Interactive rendering can produce constantly updating preview renders almost instantly, allowing for faster iteration and progression. The hours of production time that interactive rendering saves us makes us wondered how we ever lived without it. It is excellent for testing compositions, different materials or tweaking lighting setups.
Interactive rendering has come a long way from the early versions of V-Ray RT that were frustratingly unstable and otherwise limited.
The latest Corona and V-Ray interactive renderers produce impressive results in seconds and are impressively stable. Think about every time you had to make a change and perform another test render or region render to check it, interactive rendering solves this. However, they still aren’t perfect, elements like texture details can get lost it in the lower quality and large scenes can still take some time to parse.
If you are using Corona Renderer, it is worth adding interactive rendering to your quad menu (V-Ray does this by default). The Corona menu is handy while you are getting started but toolbars can be it is slow and unnecessary. We will talk more about customising your UI, including quad menus, in our next tip.
3ds Max is a versatile piece of software that is common across many industries - VFX, video games and, of course, architectural visualisation. As such, it isn’t set up for your specific use straight out of the box. Fortunately, you can customise pretty much everything to suit your needs.
The main principle here is to hide unused UI elements and make all frequently used tools easy and quick to access.
For us, this means hiding the ribbon, timeline, viewport layout tabs and Corona menu. You can hide or show any UI element by right-clicking on the main toolbar and toggling the relevant UI panel. Hiding these menus gives a minimalist UI that allows us to focus on the viewport.
Now that we have hidden the unnecessary panels, let’s make our important tools and panels easier to access. Enable the “layer explorer” by clicking “Tools -> Layer Explorer” and dock it to the left of the viewport. There is more on the benefits of organising scenes into layers later on. We like to add Corona commands “Start Interactive Render” and “Open VFB” to a quad menu and all our commonly used Maxscripts to another quad menu. These tools will be different for every artist, so think about what you use regularly.
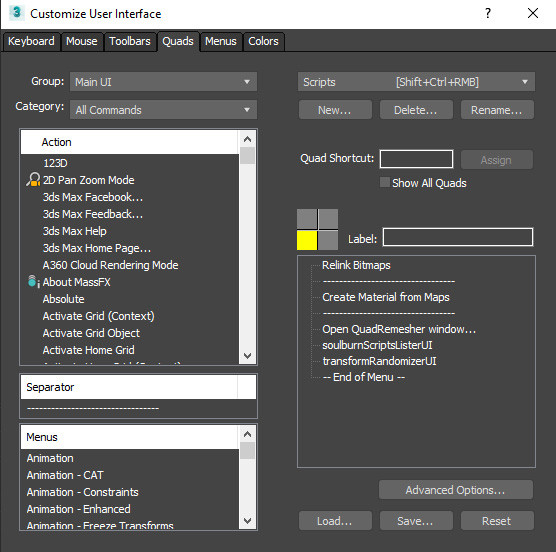
To add a command to a quad menu, go to “Customize -> Customize User Interface -> Quads”, select an action and drag it over to the right-hand panel.
You might notice that Corona has no command to “Start Interactive Render” or “Open VFB”. For whatever reason, it is not included by default, but a small Maxscript will fix that. Copy the following Maxscript into the Maxscript Listener highlight it and press shift+enter.
macroScript CoronaVFB
category:"Corona Scripts"
toolTip:"Corona Open VFB"
(
	if (matchPattern (renderers.current as string)  pattern:"Corona*") then
	(
		try(CoronaRenderer.CoronaFp.showVfb true) catch()
	)
)

macroScript StartCoronaInteractiveVFB
category:"Corona Scripts"
toolTip:"Start Corona Interactive VFB"
(
	if (matchPattern (renderers.current as string)  pattern:"Corona*") then
	(
		CoronaRenderer.CoronaFp.startInteractive()
	)
)
Now you will find the commands in “Customize User Interface” under the category “Corona Scripts”.
Once you have finished customising your 3ds Max UI make sure you save it. Your viewport layout and some UI settings can be saved and automatically loaded on startup by overwriting the maxstart.max file located in Documents/3dsmax/scenes with an empty scene that uses the desired settings.
Similarly, the remaining UI settings - quad menus, toolbars, etc. can be saved by using the “Save…” button under the relevant “Customize User Interface” tab. Save these files here: Username\AppData\Local\Autodesk\3dsMax\Your 3ds Max
Version\ENU\en-US\UI. The files should be named “MaxStartUI” along with the provided file extension, this will ensure they are loaded on start but doesn’t permanently overwriting the default settings.
For more information on this check out the 3ds Max help section.

Quad menus and custom toolbars are fast, but shortcuts are even faster.
Becoming familiar with default shortcuts and tweaking them to suit your workflow is a great way to boost your productivity. It will depend on your requirements but we like to assign common modelling commands to shortcuts such as convert to editable poly, swift loop, isolate selection, attach and so on.
Here is a list of some of our favourite custom shortcuts in 3ds Max:
| Command | Shortcut |
|---|---|
| Isolate Selection Toggle | Shift+Ctrl+X |
| Convert to Poly | Shift+Ctrl+C |
| Center Pivot | Shift+Ctrl+R |
| Attach | Shift+Ctrl+A |
| Detach | Shift+Ctrl+D |
| Swift Loop | Shift+Ctrl+S |
| Set Flow | Shift+Ctrl+F |
| Slice Plane and Slice | Shift+Ctrl+\ and Shift+Ctrl+Z |
| Inset Face | Shift+Ctrl+I |
Here is a list of the default 3ds Max shortcuts.
Custom shortcuts are created and saved just like menus. Go to “Customize -> Customize User Interface -> Keyboard”, select an action, type the key combination into the hotkey box and click assign.
Remember to save your new shortcuts by using the “Save…” button to create a “MaxStartUI.kbdx” file in Username\AppData\Local\Autodesk\3dsMax\Your 3ds Max Version\ENU\en-US\UI.
Plugins and scripts can extend the base functionality of any 3D software to better suit your workflow. There are countless tools for each of the major 3D packages, many of which are created by the community and offered at very reasonable prices, or often free.
Some of our favourite 3ds Max plugins and scripts for architectural visualisation are:
For other useful 3ds Max scripts visit ScriptSpot.
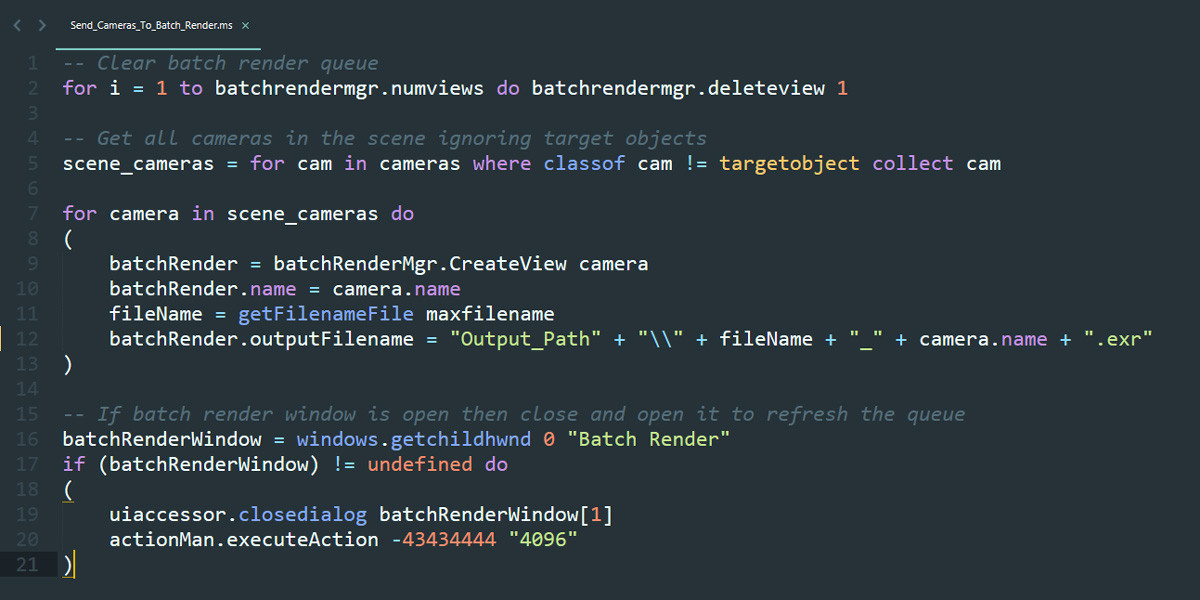
If you can’t find a script that does what you need, consider creating your own. We wrote a detailed article on using MAXScript for Architectural Visualisation to help you get started.
Populating a scene with high-quality models that are contextual and created from scratch is time-consuming and inefficient. There are situations when you will not be able to avoid it, for niche or bespoke items, but when possible buy 3D models online. It is cost-effective and cuts down modelling time dramatically without sacrificing quality.
There are many 3D model marketplaces out there but some of the best for architectural visualisation and interior design rendering are – 3dSky, Dimensiva and TurboSquid.
The same is true for creating materials. Where possible make use of online texture libraries such as Poliigon, Substance Source or CC0Textures. Or use the Corona and V-Ray built-in material libraries. They have a lot of common materials and are useful as a starting point at the very least.
Aside from online asset libraries we also recommend setting up your own local library.
3D artists quickly amass models, textures and other assets that have been purchased or created. Many of these assets could be reused and save time on future projects. So, having them organised in a logical manner that can be easily navigated is beneficial in the long-term.
It will take some time to set up and get in the habit of adding new assets, but the future time-savings justify it. A simple asset library structure could look like this:
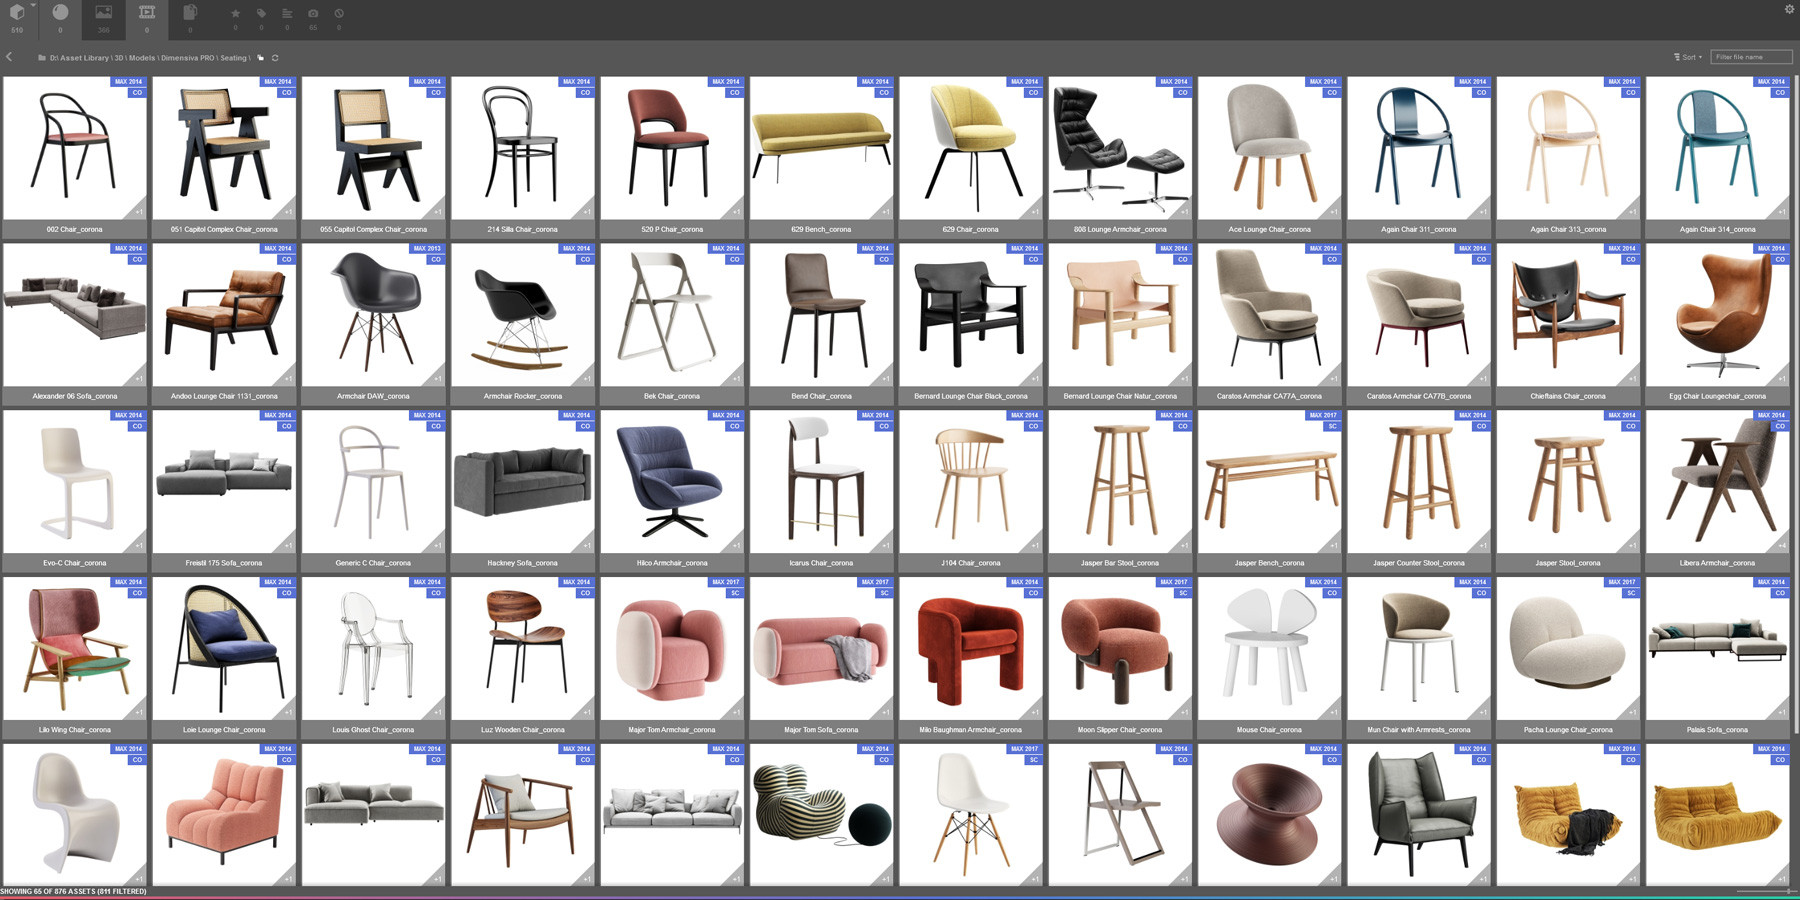
To improve your local asset library, consider installing a visual asset manager, like Design Connected’s Connector. Specifically designed for this purpose, it allows you to browse, search and merge your models faster. It also includes features such as tagging, relinking external files and auto assigning previews.
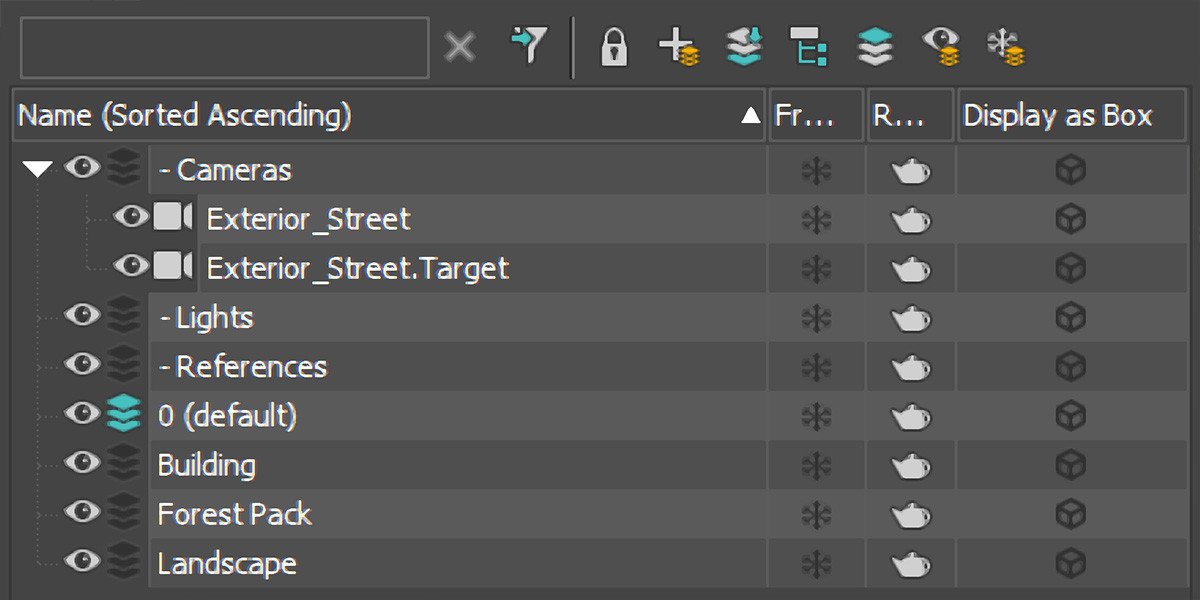
3D scenes, particularly in architectural visualisation, can be huge, easily consisting of thousands of objects and millions of polygons. Without proper organisation navigating large scenes can be difficult and selecting specific objects even more so. By logically naming objects and organising them into layers you can more easily select, toggle visibility or otherwise manipulate similar objects.
The standard layer structure of our 3D scenes is:
Dashes are used before some of the layers to bring them to the top of the layer explorer when sorted alphabetically.
Following a consistent convention is particularly important if you are working in a team. Any member of the team should be able to open a scene and easily navigate through it.
Naming objects is just as important. Again, this helps with selection within the scene but also with merging in the future. Will you be able to remember what object_4679 is six months from now? A tool that can be help with this in 3ds Max is “Rename Object” located in the “Tools” menu. It allows you to rename multiple objects at once and can incrementally number them.
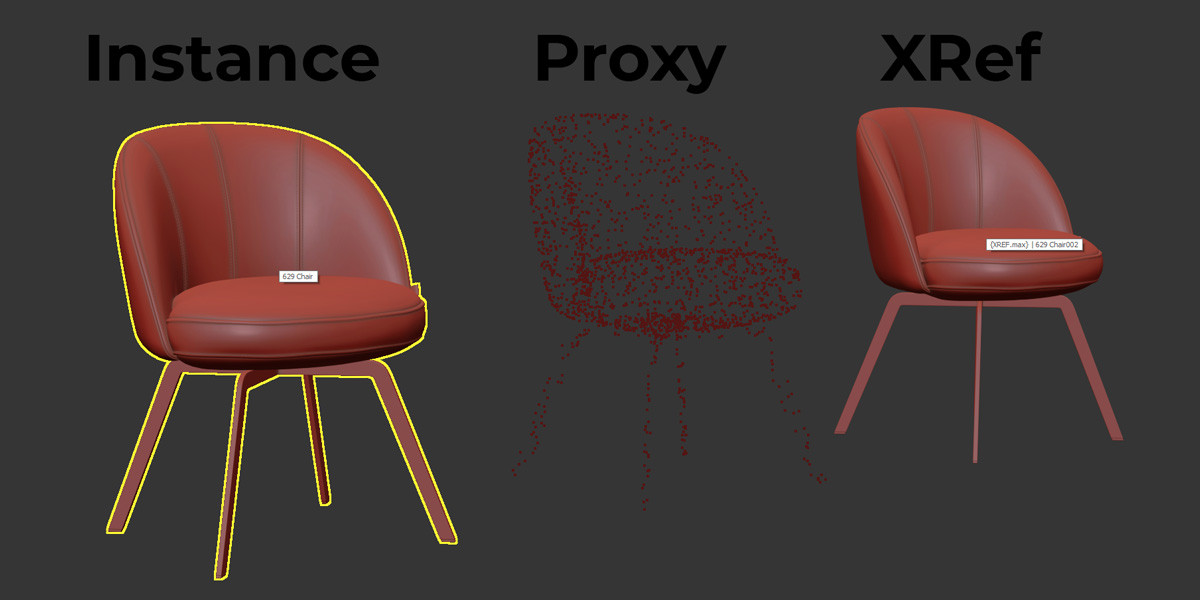
It took me much longer in my 3D career than I would like to admit before I understood each of these terms and when to use them. Each has its benefits and reasons to use in particular scenarios.
Instances are duplicates of an object that link together, meaning if you edit one, the others update as well. They use less memory and will not increase the file size of a 3D scene as only one object is stored. This makes it very useful for objects that are repeated many times within a scene such as pieces of furniture, lights, windows, etc.
Proxies are external files that are loaded into memory at render time. This allows you to create proxies of high-poly objects which reduces file sizes, memory usage and improves viewport performance (as proxies are displayed as point clouds). High-poly objects that will not need to be edited typically make for good proxies e.g. trees, curtains, detailed furniture, etc. Proxies can (and in most cases should) be instanced.
XRef Scenes are externally referenced 3ds Max scenes. They can be temporarily loaded into other scenes but they cannot be edited. This means you can link together multiple max files allowing artists to work on different parts of a scene simultaneously. For example, you could have one artist working on furniture, another optimising buildings and a third developing landscaping. Each file is then referenced in a master scene. The main benefit of this approach is that it allows multiple artists to work on the same scene.
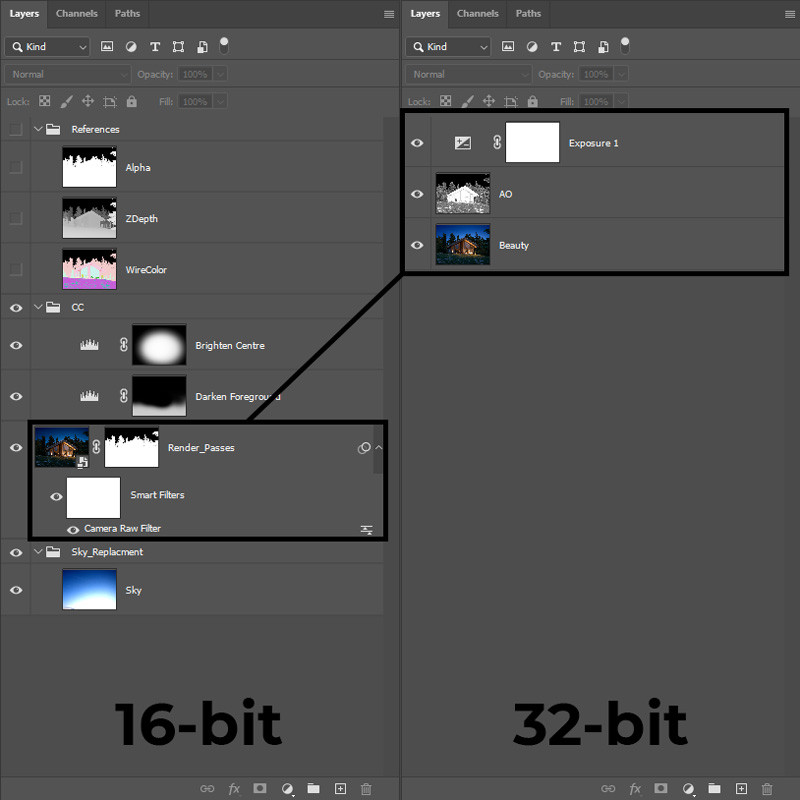
A non-destructive post-production workflow allows you to edit an image without making permanent changes to the raw render.
This can save you time when you need to make changes as only the raw render needs to be updated, the adjustments are then made automatically. Our Photoshop post-production workflow looks like this:
As none of the changes are collapsed, or baked in, you can still make changes to the 32-bit version of the image whenever you like.

As a recent convert myself, I have to say that this one was difficult for me. Having used the compact material editor for over ten years I just could not see the benefits, or purpose, of the slate editor. But clearly, as I am writing this, I was wrong. In truth, once I gave it a go, it only took a few minutes to understand why I needed to switch.
Being able to view a material and all of its maps at once just makes sense.
This combined with the ability to completely reuse a selection of nodes simply by clicking and dragging once makes creating materials faster and more intuitive.
To get the most out of the slate editor, save your commonly used nodes into an easy to access group. To do this click on the down arrow in the top left of the material editor (next to search) and select “New Group”. Then drag maps and materials into it, they will now be here every time you open the material editor.
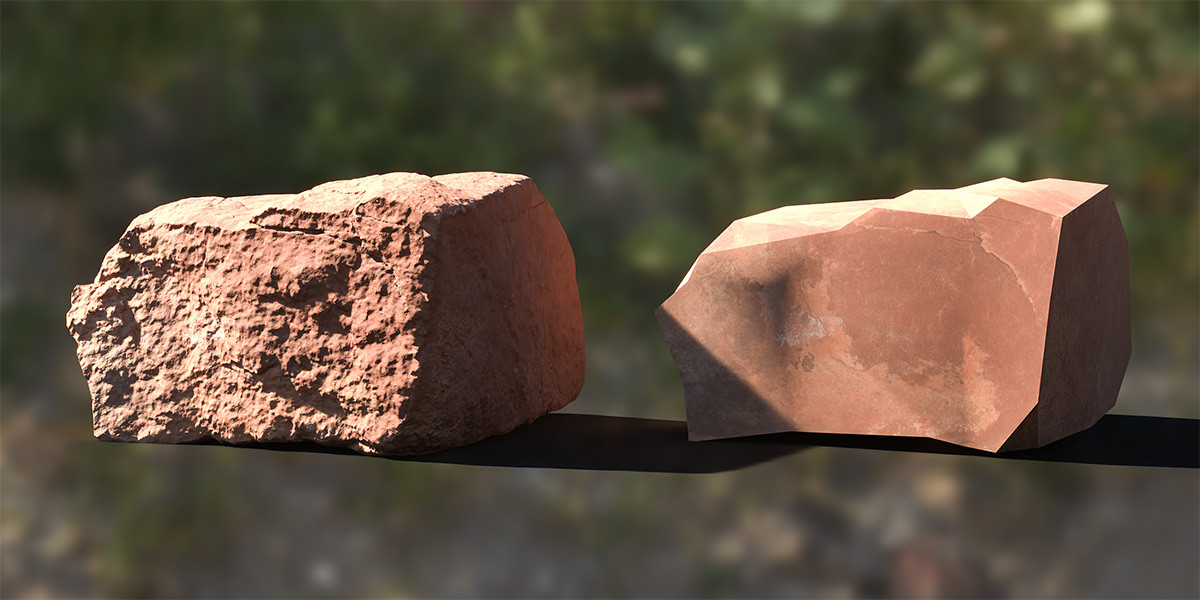
This of one of those “work smarter not harder” tips. If an object isn’t going to visible in any of your views (or reflections) then don’t model it. I know, it’s an obvious one but it also applies to the level of detail of a model. Sure, it is worth spending time perfecting the edge wear and imperfections of an armchair in a close-up shot. But if you can only catch a glimpse of it through the window of an exterior view, then don’t bother. Not only will it take you longer but it will also use up additional computer resources.
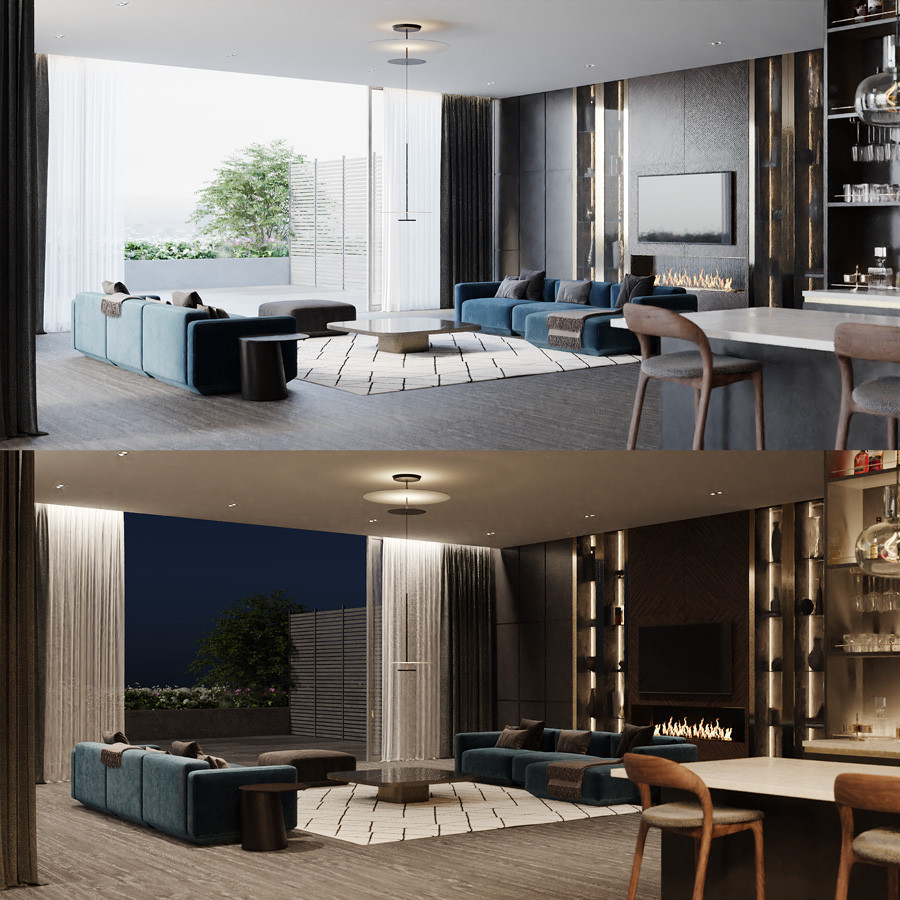
One of our favourite rendering advancements in recent years (alongside Interactive Rendering) is LightMix.
The ability to tweak a lighting setup or completely rework it in an instant is a game-changer. It is so easy to set up that there is no reason not to use it. You can even make changes much later on by saving out a CXR file and using the Corona Image Editor.
There is not much more to say about LightMix, we fully expect that every artist is already using it in their workflow, but considering how useful it is and how much time it has saved us, we couldn’t omit it from our list.
In an industry with so much art and creativity, becoming a more productive 3D artist might not seem particularly glamourous, and it probably isn't at the top of your list of things to do. But it is important. By perfecting your workflow, you will work faster and with more confidence. In turn, you will become a more valuable artist and free up more time to focus on the quality of an image or other creative tasks.
Improving your productivity is an ongoing process, it is something that should always be running in the background. Constantly be on the lookout for areas that you can improve and inefficiencies in your workflow.
Every day we should be trying to improve ourselves and the way we create art.
Let us know what you think! Would you like to see more content like this? Or have you got a question for us? Either way, we look forward to hearing your thoughts and continuing the discussion.
Alternatively, if you want to talk about career opportunities, discuss an upcoming project, or just say hi, we would love to hear from you too!