5th August 2020
What is photogrammetry? And how is it relevant to architectural visualisation?
Photogrammetry is the process of extracting data and measurements from photographs. It dates back to around 1840 when it was first proposed by a French surveyor as a method to create topographic maps. The process has evolved since then but the basic principles remain the same.
Artists can use photogrammetry to speed up the creation of 3D models and improve their realism. The process involves taking a series of photos of an object and using software to reconstruct them in 3D. The software looks for matching features in the photos to determine their relative positions. Once it understands how the object looks from different angles, it can generate a 3D model. This process is useful in interior design rendering and architectural visualisation, as creating high-quality bespoke assets manually is very time-consuming.
Some objects are better suited to the 3D scanning process than others. Here are some examples of objects that are not suitable for 3D scanning:
With that in mind, some of the best candidates for 3D scanning are:
These are mostly detailed or organic surfaces that scan well and are complex to model manually.
A great thing about photogrammetry is that it is easy to get started and experiment with, you only need a smartphone and a 3D scanning app. If you want to create better quality 3D models you will also need a PC and a free app called Meshroom.
In more specialised cases 3D scanning can be more expensive. For example, creating a purpose-built rig to 3D scan people, or using a drone to record buildings and large areas of terrain.
Although using a smartphone for 3D scanning is rarely useful in production, due to current hardware and software limitations, it is only a matter of time before it will be. After testing many of the 3D scanning apps available on Apple's App Store we settled on using an app called Scandy Pro. We found that it had the most useful features, including a handful of different export options.
An app called Capture: 3D also deserves a mention. It is well designed and produced some great results in the app but unfortunately, we weren't able to export anything useful from it.
What you will need to get scanning:
Firstly setup your object in an evenly lit environment and launch the app. Tap "Create Scan" followed by the circle at the bottom to begin scanning. Now, this is where it gets a bit tricky. The app utilises the iPhone's TrueDepth front-facing camera, so it can be difficult to see the screen as you are circling around the object. We recommend taking it slowly and being patient, it took us a good number of attempts before we were able to get an entire scan of our object. We finally settled on a technique of holding the phone upside-down and moving very smoothly, to ensure the tracking was not lost.
Once you have completed the scan, you can save it and make edits to it such as cropping parts of the mesh and filling in holes. The free version of the app limits you to saving one scan per day, so make sure you are happy with it before you save. If you want more freedom, the premium subscription is only £1.79 a week.

As you can see our results are far from perfect but we were still impressed, it is a free mobile app after all. By default, the app uses vertex colours to mimic the real-world textures. It has the ability to produce textured models as well, but in our experiences, this feature does not work well. The resulting mesh and textures are always misaligned. If you want to try it out, you can turn this feature on under "Settings -> Advanced Preferences -> Texture Mapping". Then when scanning tap the red, green and blue circles and select "Texture Map".
You can export your model in a variety of formats (ply, obj, stl, etc.) or publish directly to Sketchfab.
The results will likely not be good enough for use in production, but the workflow and possibilities are very exciting. Improvements in hardware in the coming years, combined with a more reliable and controlled scanning process, will give this workflow a lot of potential. We only covered the basics here, if you want to get more information on how to use Scandy Pro, check out their tutorials on YouTube.
As we covered above, in most cases, the mobile workflow won't create a high enough quality output for architectural visualisation. So instead, we use a different workflow. The high-level steps of this workflow are - take photos of an object, use Meshroom to generate a 3D model and then optimise the 3D model. This workflow gives us more control and allows for the creation of more accurate and higher-quality 3D models.
What you will need to get scanning:
First things first, place your object in an evenly lit environment. This will help with the quality of your scan and will minimise shadows in the generated texture. Large windows are great as sources of diffused light, or even better, outside on an overcast day.
Circle around the object taking overlapping photos from varying angles and heights, ensuring you capture every angle and surface. Aim to fill most of the frame with the object and do not be afraid to take close-up shots to capture smaller details. Keep the object in focus at all times, motion blur and depth-of-field make it more difficult to match features between photos. As a rule of thumb take at least 50 photos, detailed objects will need more, but keep in mind, more photos means longer processing times.
It is vital that the object and its surroundings do not move during the scanning process, this is because software matches features in both of them during the reconstruction. The more stationary points of reference the photos have, the more accurate the results will be. Remember to cover any highly-reflective surfaces with tape or chalk spray paint to ensure they do not cause any issues.
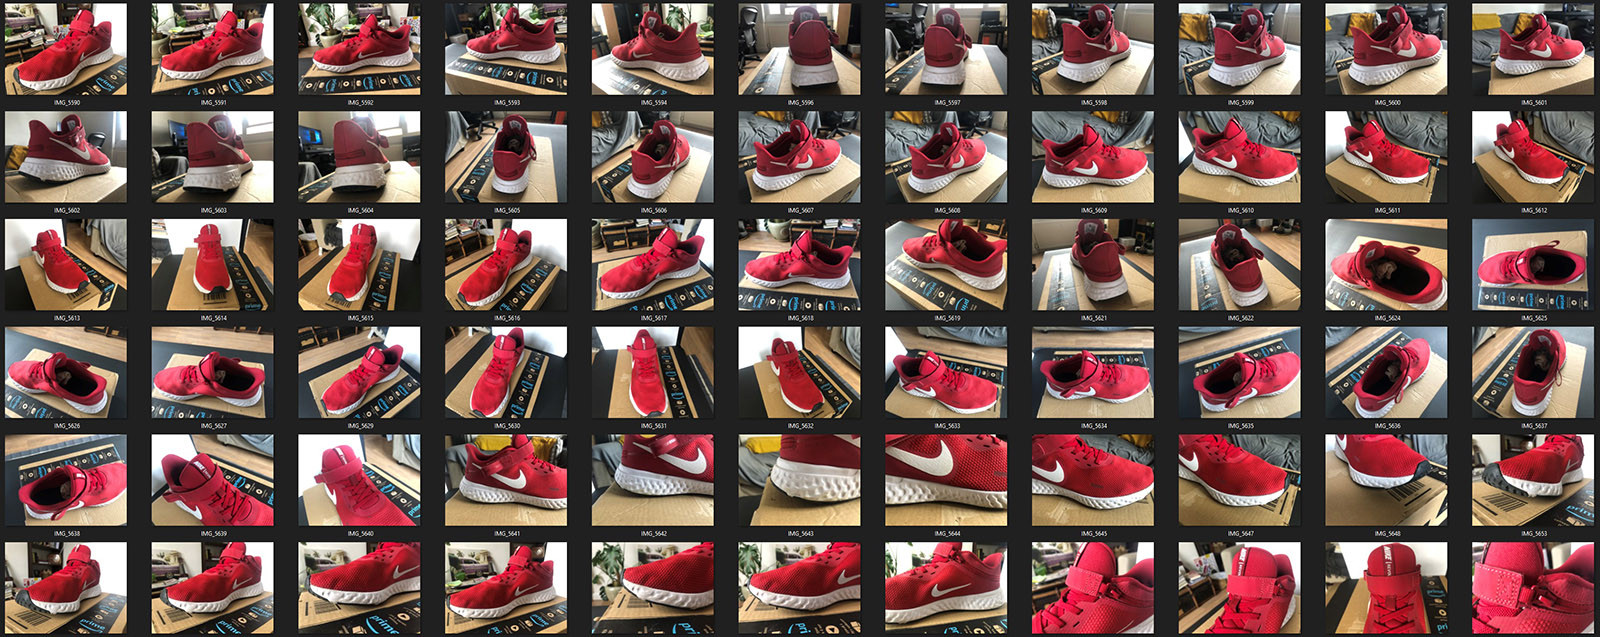
For this scan, we used an iPhone X and took 70 photos. We did 3 rotations of around 15-20 photos at different heights. Then finished by taking some detailed close-ups. The object was positioned near a large window with a white canvas behind it to help bounce light and reduce shadows.
Now we use Meshroom to transform our photos into a point cloud and then a textured model. We are only going to cover the basics of Meshroom, if you want to find out more about check out their documentation.
We start by importing our photos by dragging them into the left-side "images" panel and saving our project. It is important to save the project at the start as Meshroom uses the save location to store outputs at each stage of the workflow. So this helps keep everything organised.
You will notice the nodes in the graph editor in the bottom panel, these represent the Meshroom workflow. You can click on any of these and see their parameters in the bottom right "Node" panel. Right-clicking on a node will allow you to - "Open Folder" to view its outputs or "Compute" to execute the workflow up to and including the selected node. With this in mind, right-click the "StructureFromMotion" node and select "Compute". Starting from left to right you will notice the nodes starting to complete and turn green.
Here is a key for what the node colouring represents:
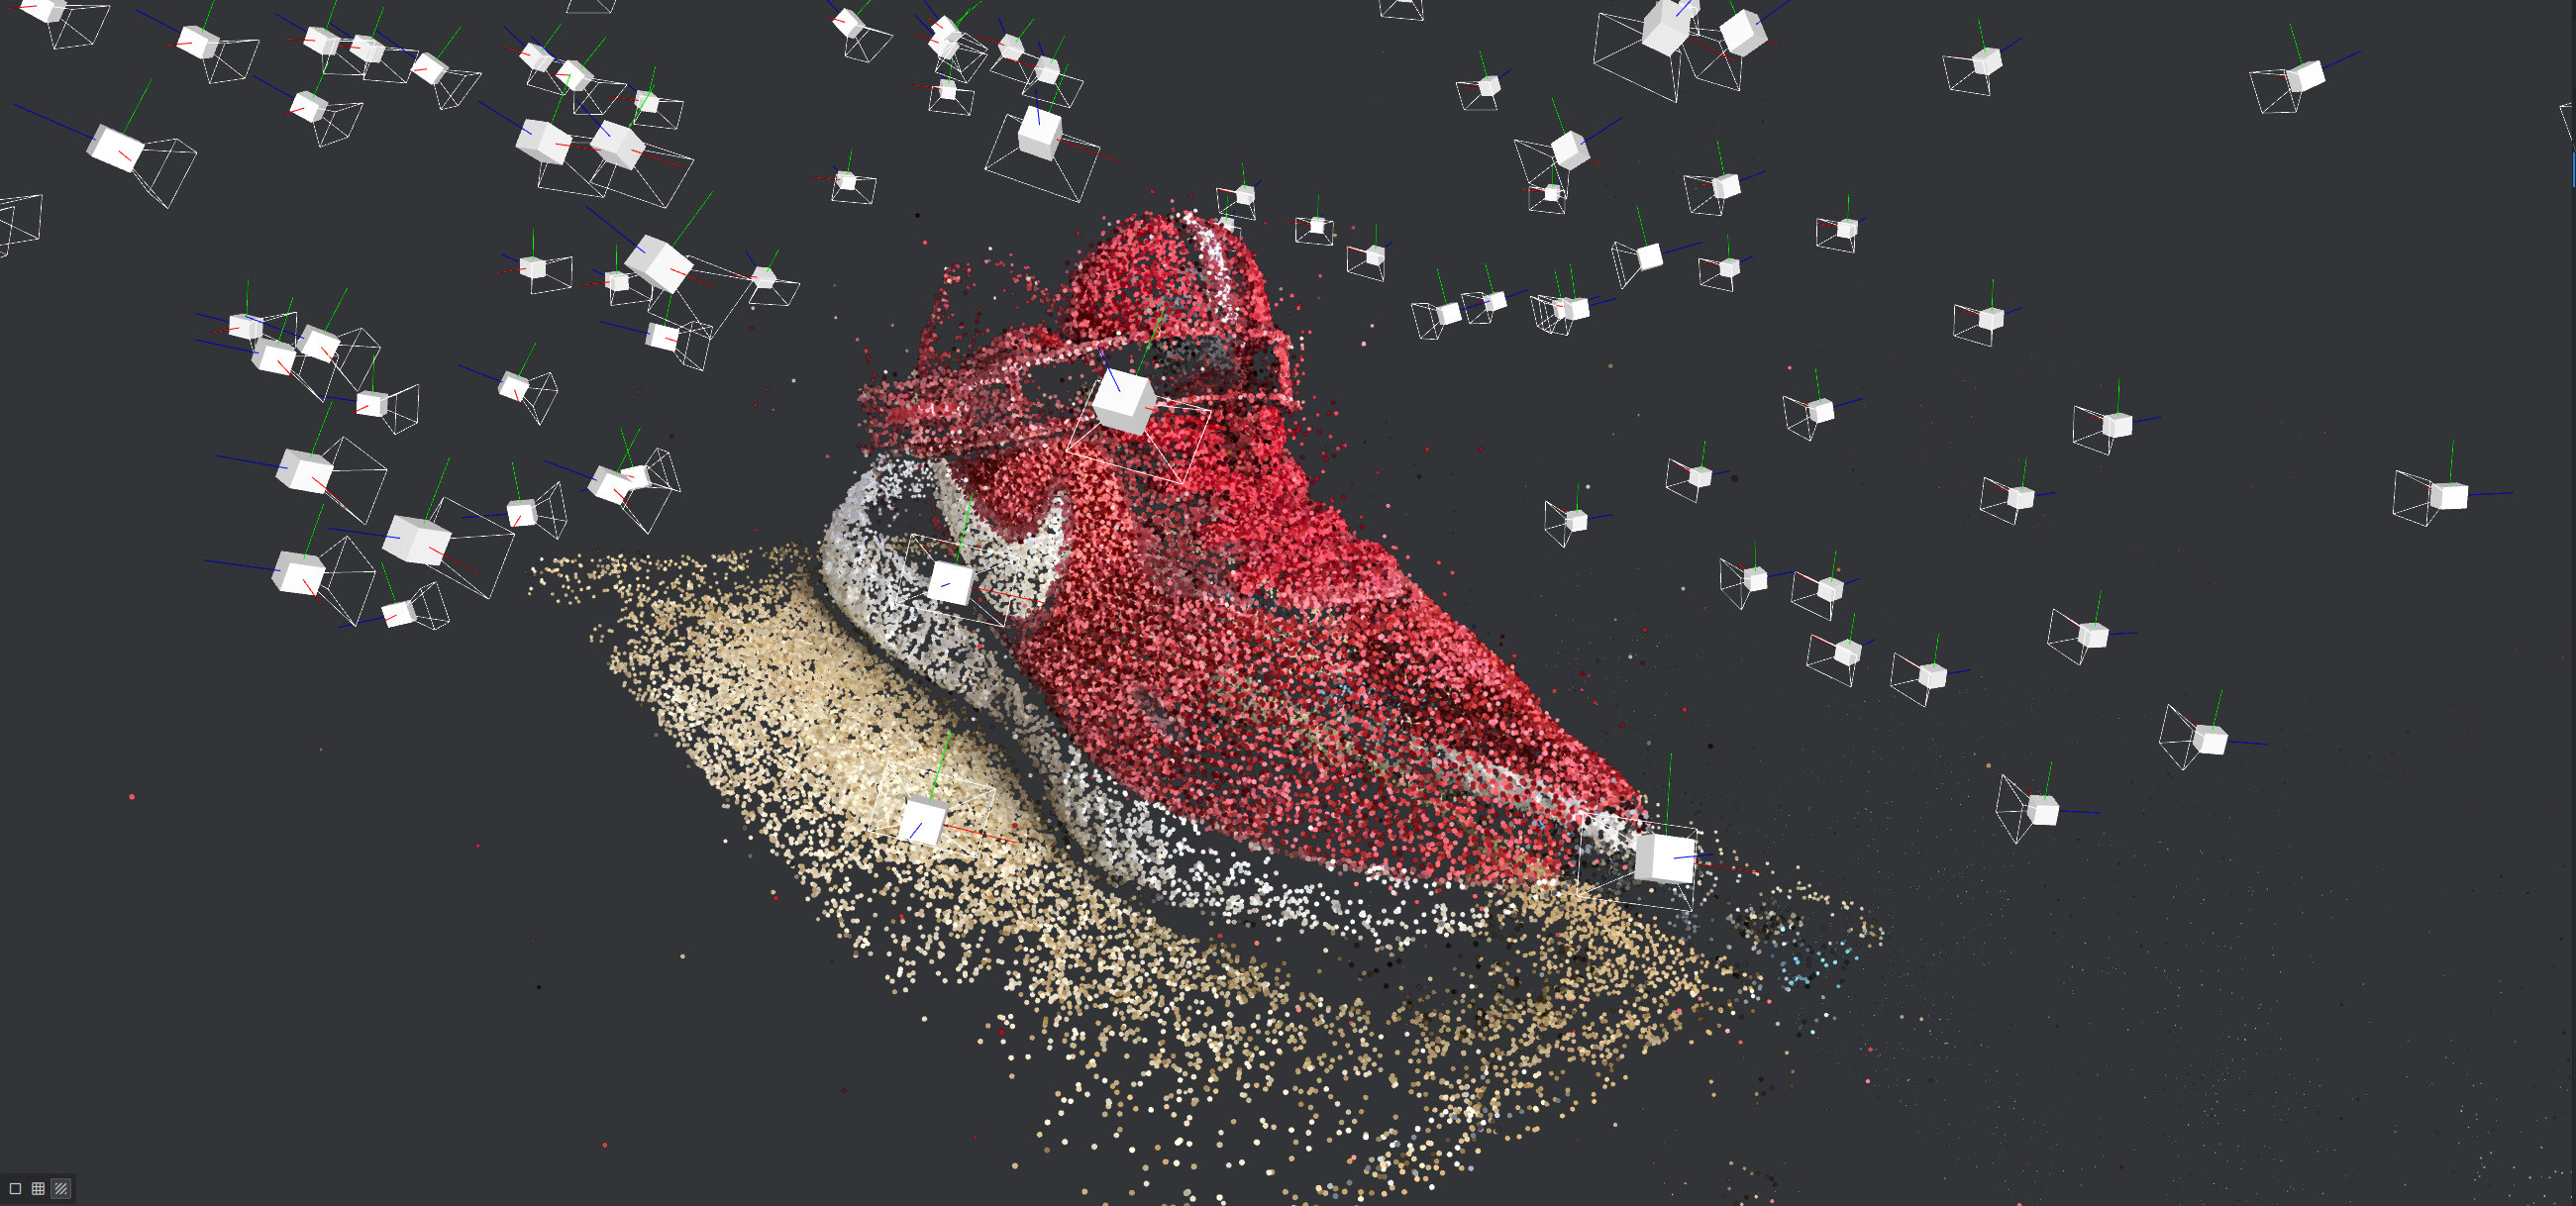
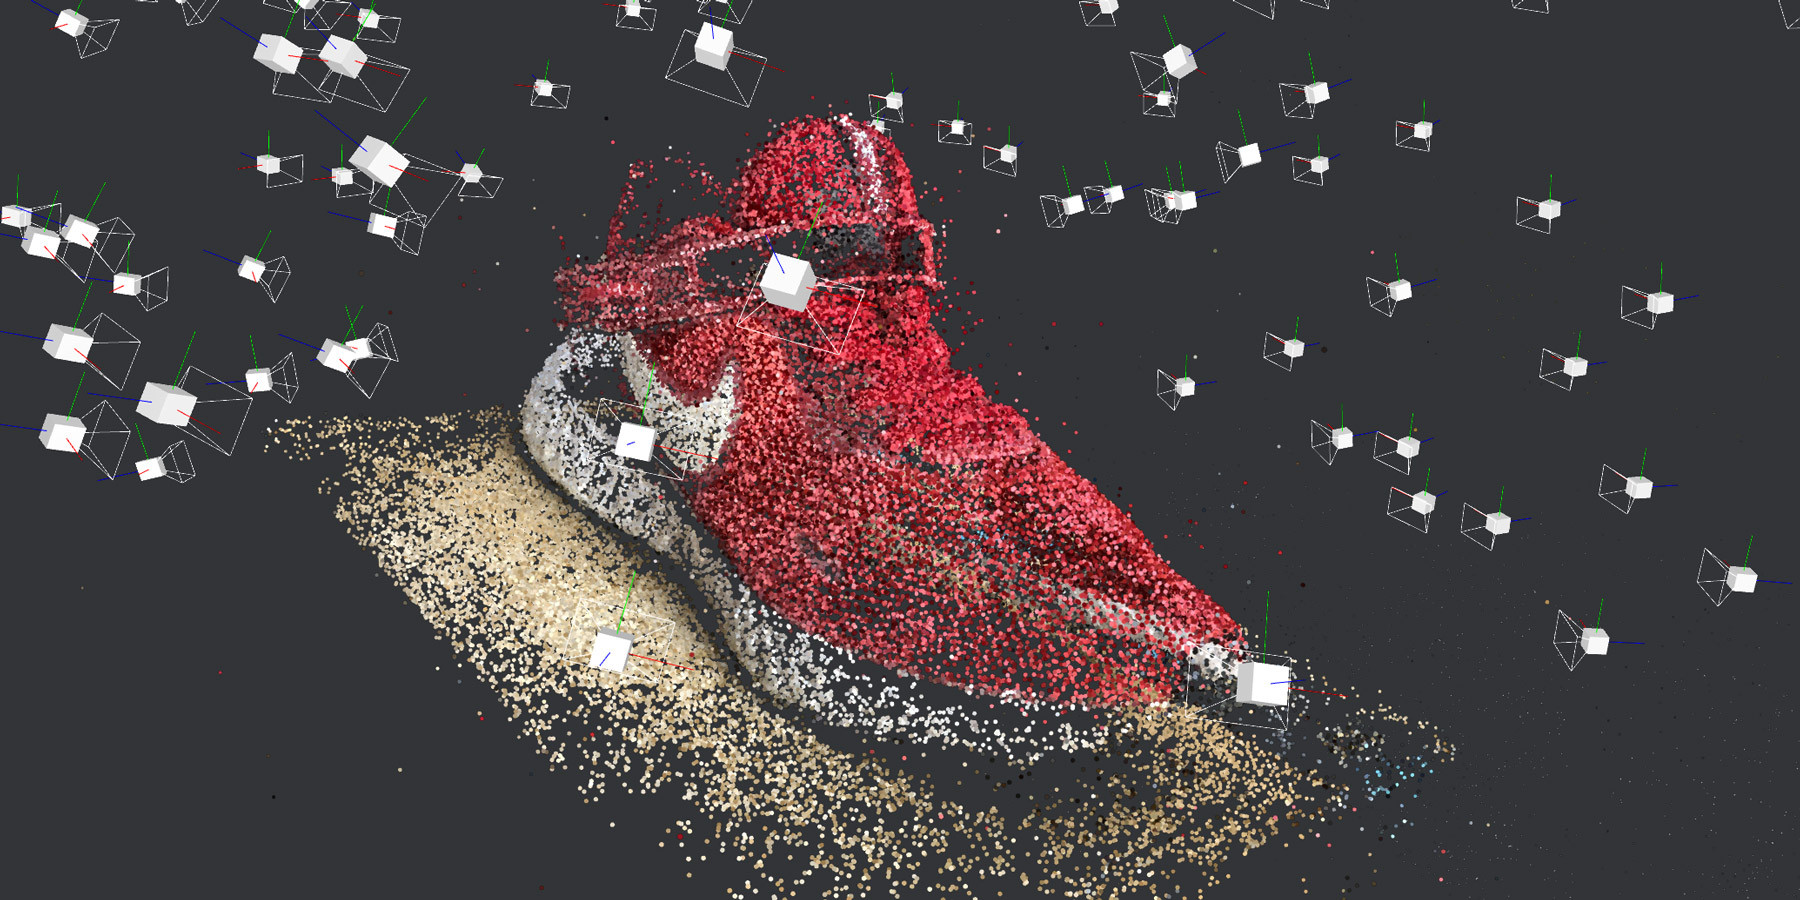
Once "StructureFromMotion" has turned green you will see a point-cloud of your model surrounded the successfully reconstructed cameras in the "3D Viewer" panel. By only computing up to this point we get an understanding of how the textured model will look before committing to the lengthy process of generating it.
At this point, it is important to check that our photos were successfully reconstructed and that there are no large gaps in the point cloud. Photos that were successfully solved will have a green mark next to them, and conversely a red mark if they were unsuccessful. Navigate around the point-cloud checking for any large areas without points, these areas have limited information and may not be calculated correctly. Providing you have not moved your model you can always go back and take more photos. These can then be added in to improve upon the initial results.
When you are happy with the point-cloud right-click the "Texturing" node, select "Compute" and grab a coffee. The amount of time this takes is dependent on your photo set and computer, but it is not uncommon for it to take upwards of an hour.
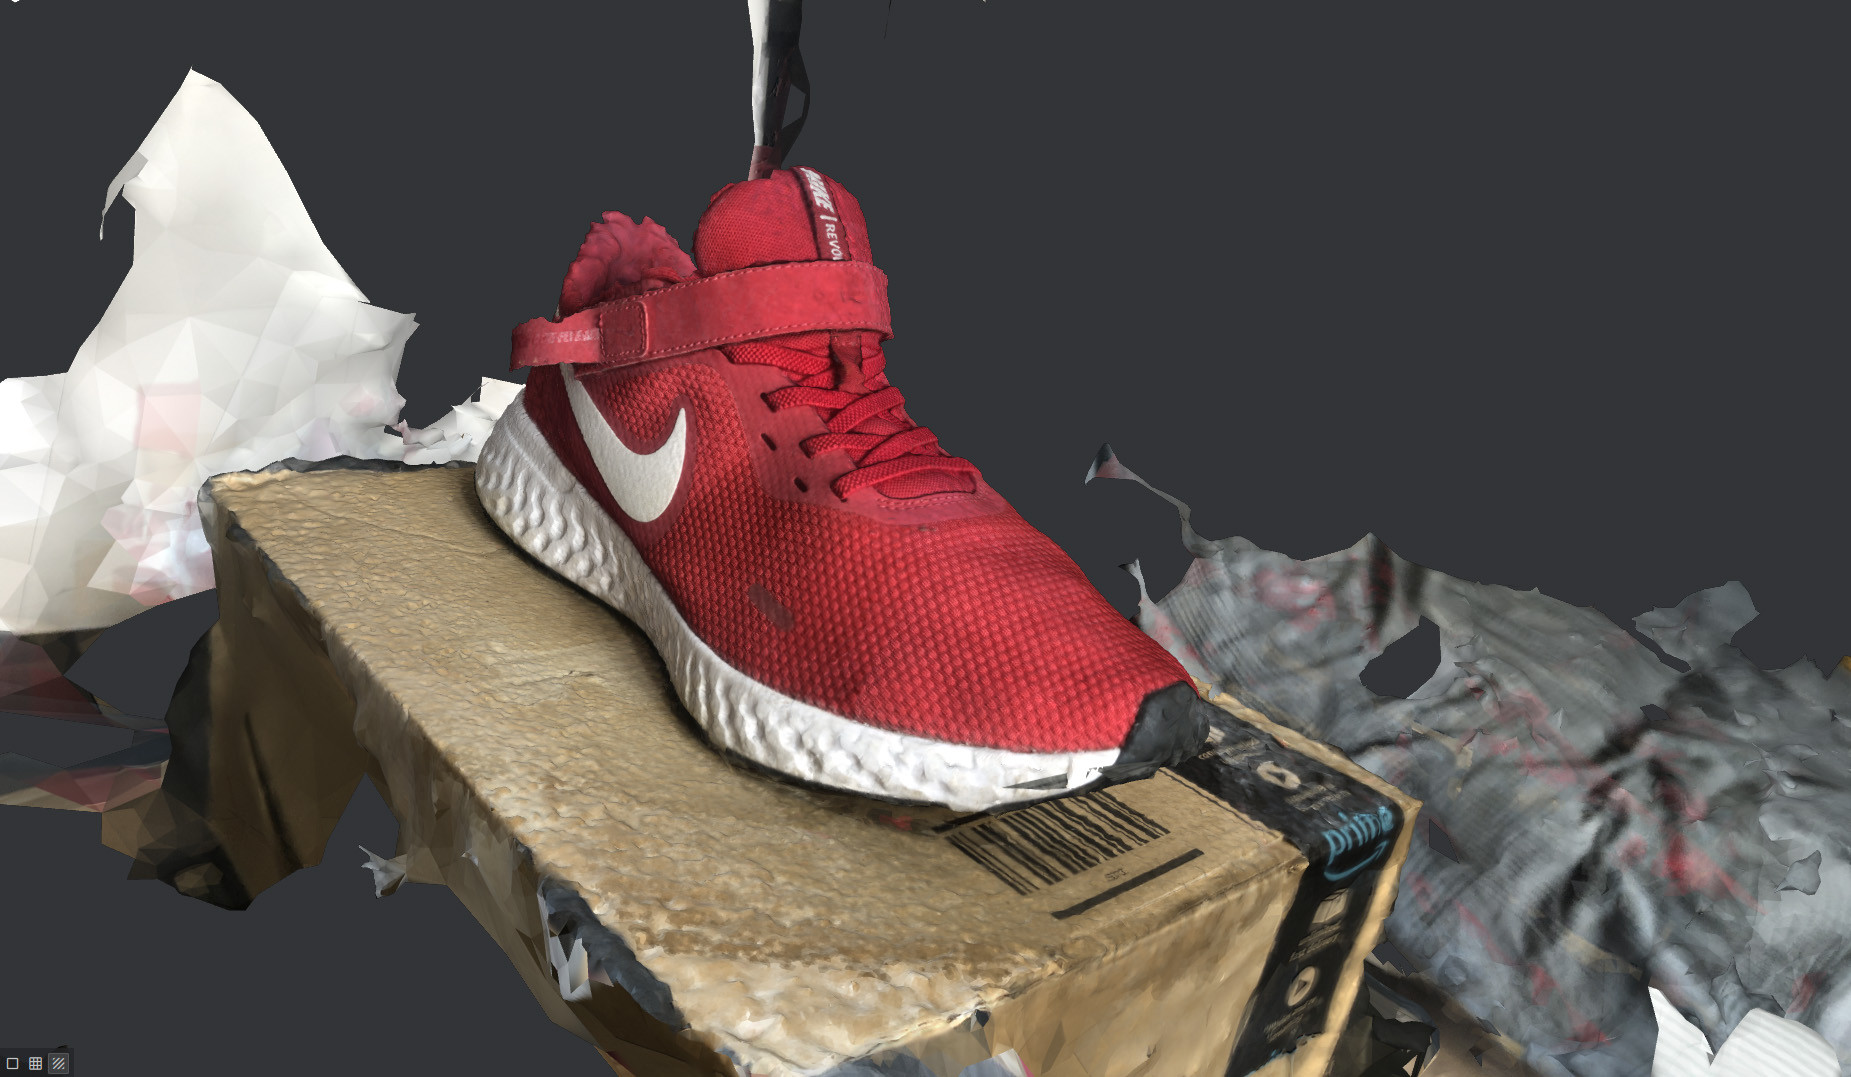
Once all the nodes turn green the process is complete and your model has been created. Double-click on the "Texturing" node to view it in the "3D Viewer".
You do not need to do anything to export your model, it is all done for you. Meshroom automatically saves out the model and the textures as OBJs and PNGs respectively, right-click on the "Texturing" node and select "Open Folder" to see them.
The final step of the process is to clean up and optimise the model.
We do this by:
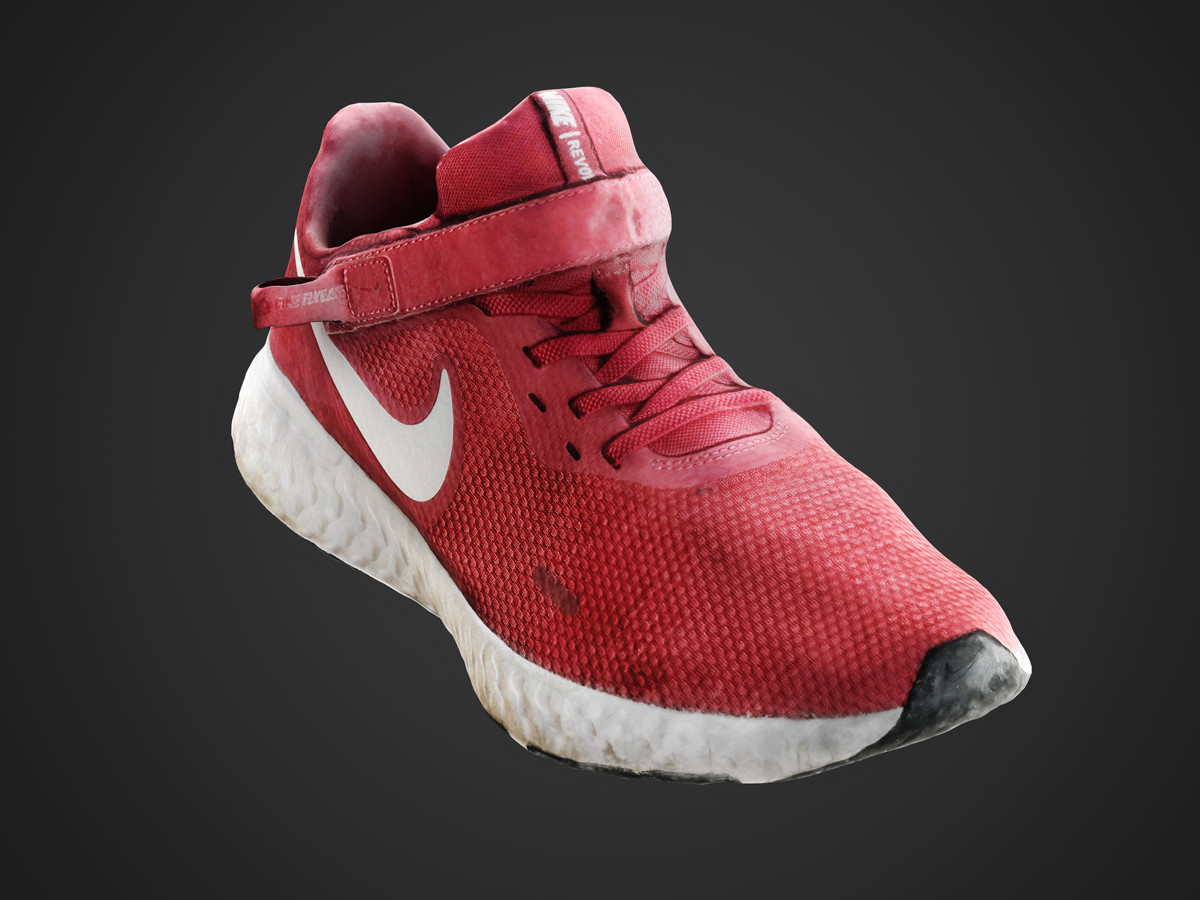
Once this is complete we have our final model! You can see the results below, feel free to download the model from Sketchfab and use it as you wish.
You will notice that the model also includes the sole of the shoe which was not visible in our initial scan. This is because we performed a second scan of the underside of the shoe and merged the two together before unwrapping the UVs and baking the textures.
Here it is rendered in a studio setup:
This process might seem complicated and long-winded, so why do we bother?
Well providing it is being used on appropriate subjects - it is more efficient and output is both more accurate and realistic. The model we show our process was created in only a few hours, whereas it would take an artist days to model it manually to the same level of quality.
Hopefully, this gives you an insight into what photogrammetry is and how it is used in architectural visualisation. We are very excited about what the future holds for photogrammetry and modelling techniques in general. It won't be long before anyone can point their phone at an object and create a perfect 3D model of it. But until that becomes a reality, we are content with our current workflow that gives us the ability to create complex 3D models in a matter of hours.
What do you think about our workflow? Do you use something similar? Or do you have suggestions for how we can improve it?
Let us know what you think! Would you like to see more content like this? Or have you got a question for us? Either way, we look forward to hearing your thoughts and continuing the discussion.
Alternatively, if you want to talk about career opportunities, discuss an upcoming project, or just say hi, we would love to hear from you too!